Thursday 26 October 2017

Besan Ladoo

After making the ribbon pakodas, I had little besan left and wanted to make a sweet recipe out of it. After surfing through I found out this easy recipe to make besan ladoos. This is a very simple recipe with very few ingredients. I got only 6 ladoos. The taste was awesome and I felt I should have made more.


I have tasted and posted the maaladu which we make with fried grams powder (pottukadalai maavu). This besan ladoo tasted similar but not the same. I was intrigued to find out the difference. I asked around my office colleagues and they were not able to spot out the difference. Finally I took help from Google. After surfing through many different sites for the explanation - this is my understanding. We have broadly 2 types of chickpeas - the black chick peas or the kabuli chana and the white chick peas or the garbanzo beans. If the black chick peas is powdered with the brown/black cover over the lentil then the color of the powder is light brown. If the white chick pea is powdered, the color of the powder is kind of beige. The outer cover of the black chick pea is removed and the lentil / dal is split which is then known as split bengal gram or our chana dal; kadala parippu in my native language. The powder of this split bengal gram is the besan or gram flour or kadala maavu. This black chick peas or kabuli chana is soaked, boiled and roasted (at a very high temperature) to make the fried gram or the roasted chana dal. We typically use this fried gram to make ladoos, or use it in chutney and so on. If I am correct the powder of this fried gram is called Sattu in some parts of North India. Phew!!! that was a very big explanation.


So essentially fried gram powder or pottukadala maavu is cooked and besan or kadala maavu is uncooked. So it is mandatory that we fry this besan thoroughly before making the ladoos. All North Indian mithais / sweets are about ghee mainly and the ghee taste should be there. So you cannot make it so dry like rava ladoo. Enjoy this sweet!!


Ingredients:

Besan/ Gram flour / Kadala maavu - 1/2 cup
Powdered Sugar - 1/2 cup
Ghee - 1/4 cup
Cardamom / Elaichi - 2 nos


Method:

  • Roast besan well in medium flame with constant stirring until it turns deep golden brown in colour. 
  • Take care not to burn the flour, as well as make sure it is roasted well. Cool down and sieve it well.
  • Powder sugar with elaichi / cardamom and add it to the roast flour in a mixing bowl. 
  • Melt ghee and add the hot ghee to it.
  • Mix well with a spatula and when it is warm enough to handle, make nice round shaped ladoos.


Notes:

  • At one stage the flour starts browning at the bottom of the pan, so keep stirring carefully without letting it burn. 
  • If not roasted properly, then the raw smell of besan and taste of besan will not be pleasant. 
  • You can also add the ghee to the flour while frying and just add the powdered sugar to it and make ladoos. 
  • Ghee is the only flavor that brings taste to the ladoos, so never reduce it than mentioned
  • You can garnish this ladoo with dry fruits like badam pieces or cashew pieces. I just left it plain.


BMLogo

Check out the Blogging Marathon page for the other Blogging Marathoners doing this BM#81

Wednesday 25 October 2017

Ribbon Pakoda

A mega festival in India just got over - Deepavali. I guess this is one festival which is celebrated across India - in all states. Since this festival marks the beginning of Winter, this festival is celebrated with savouries and sweets and most of them are prepared at home. Today I am presenting Ribbon Pakoda Which my mother prepares for Deepavali every year.


Ribbon Pakoda is my favourite among the savouries that my mother prepares. She prepares a huge tin full of this savourie and I happily gorge it up within minutes. I can eat this the whole day without any other food. Since I always get this from my mother, I haven't tried making this of my own. This Deepavali I tried my hands on making this Ribbon Pakoda. 


Though I followed my mom's instructions I still feel my ribbon pakoda was not like my mother's. Of-course the acchu (the plate in the murukku press used to make this ribbon pakoda) has a small difference. But still taste-wise also I felt something is missing. Probably the mother's-touch. 


Ingredients:

Besan / gram flour - 2 cups
Rice flour - 1 cup
Butter - 2 tbsp
Salt - to taste
Hing / asafoetida  - 1/2 tsp
Chilly powder - 1 tbsp
Oil - to deep fry


Method:

  • Heat a Kadai with oil to deep fry.
  • In the meanwhile, in a wide bowl, add riceflour, besan, butter, asafoetida, chilli powder and salt. Mix everything well.
  • Now add water little by little and make a smooth dough. The dough should not be too tight or too loose.
  • Prepare the nazhi/press with the ribbon pokkodam achu (one with hyphens '-')
  • Place a golf sized ball of the prepared dough in the nazhi/murukku press.
  • Check if oil is ready by dropping a tiny drop of the dough in the oil, if it rises up immediately then the oil is ready.
  • Lower the heat, and squeeze out the dough in a circular motion into the oil from the nazhi/press.
  • Keep heat in medium and fry by flipping the pakoda once or twice in between.
  • Remove from oil when the bubbles in the oil have almost subsided. Drain on tissues.
  • Repeat the same with remaining dough.
  • Drain and cool then store in airtight container.


Notes:
  • Homemade rice flour works best and tastes best, though store bought flour will do too.
  • If making in large quantities, mix all dry ingredients in a big bowl and take small portions and mix water to make dough.
  • If the dough is kept for too long, then the pakodas will become very red on frying.
  • If the dough is too tight, then it will be very difficult to squeeze out pakoda. And if too loose, then the pakodas will get cut while squeezing also, they will drink too much oil.
  • While storing make sure the pakodas are cooled completely before closing them in the airtight containers, else the vapour will condense and the pakodas will lose their crispiness.


BMLogo

Check out the Blogging Marathon page for the other Blogging Marathoners doing this BM#81

Tuesday 24 October 2017

Pantua | Bengali style Gulab jamun

This month is my blog's anniversary. I started this blog with just the intention of penning down my recipes and have been successfully doing so for the past 5 years. But now seems like I cannot live without this blog and my fellow marathoners. But the blog has not taken the top priority in my life. This year thanks to blogging marathon I have posted the highest number of recipes for a year. I can try to make it a century by december. 


For this week's blogging marathon I have picked up Diwali special sweets and savouries. Last month during the mega marathon my fellow marathoners presented many sweet recipes and I had bookmarked almost all of them. I picked up a bengali style sweet to start with - Pantua. Valli had posted this recipe and she has said in length about this bengali style gulab jamun and how this differs from the traditional gulab jamun that we make. Though I knew that gulab jamuns are made from khoya and all purpose flour; I have always tried it only with the MTR - gulab jamun mix. This time after seeing Vallis post I was tempted to make these jamuns and they turned out really yummy. 

I made very small balls and with the chana of about 4 litres milk; I got close to 30 balls. We all loved them and I also distributed these to friends and relatives. The effort involved is quite huge when compared with making with MTR mix but the taste is just out of the world and also the special feeling that you made it entirely by yourself.


Ingredients

Chana:
Milk - 4 litres
Lemon Juice - 4 tsp
Water as required

Sugar Syrup:
Sugar
Water
Cardamom powder
Saffron

Pantua:
Paneer / Chhana well kneaded - 1 cup 
Khoya - 2 tbsp 
A Pinch of Baking powder
All Purpose Flour / Maida - 1 tbsp 
Ghee - 1 tbsp 
Cooking Oil for deep frying


Method:

Prepare the chana

  • Have the lemon juice ready at hand.
  • Have a bowl lined with a muslin cloth and keep it ready.
  • In a thick bottom pan, boil the milk till it boils over, simmer for 5 mins.
  • Remove it from flame, add the lemon juice slowly and gently stir for the cheese to separate.
  • When you see greenish water, pour the entire content over the muslin cloth to gather the cheese.
  • Pour water over the cheese couple of times to remove traces of lemon 
  • Gather the edges of the cloth to tie the cloth and let it drain completely.
  • Ensure that the chhana is not completely dry.


For the sugar syrup

  • Take the sugar with water and let the sugar melt and remove the impurities if any. Then boil the sugar with the water till one string consistency is reached. 
  • This will take about 8-10 minutes. The syrup should be thick like how you make for gulab jamun.
  • Add cardamom powder and saffron to this sugar syrup and keep it aside.


For the Pantua

  • Take the crumbled paneer on a plate and with your heel, knead till there are no coarse grains or lumps and the Chenna becomes very soft.
  • Add the khoya, flour, ghee, baking powder to the soft chhana and knead it for nearly 10-12 minutes or till it starts releasing oil to make a smooth textured dough. 
  • In this stage, we must start with little flour and add as we go on kneading depending on how stiff the chhana becomes.
  • Cover the bowl and keep it aside for 30 minutes and divide the mixture into equal sized balls.
  • Heat a kadai with oil and reduce the flame when it reaches smoking point.
  • Gently drop the balls and fry on medium flame till golden brown.
  • Drain the Pantua and soak them in the prepared warm sugar syrup for 2-3 hours.


BMLogo

Check out the Blogging Marathon page for the other Blogging Marathoners doing this BM#81

Thursday 12 October 2017

Apple Jaggery kheer

Apple kheer or Apple payasam is easy to prepare and tastes absolutely heavenly. Again I saw these recipes in my fellow marathoners post. After seeing all the kheer related posts; I understood that the recipe is very easy to make but I wanted to make a difference. So I replaced sugar with date palm jaggery. We all loved this kheer at home. This can be an ideal recipe for any festivals or any special occasions. No one identified that apple was an ingredient in this kheer. Do try this different kheer.


Ingredients:

Apple - 2
Milk - 1 litre
Date palm jaggery - 3/4th cup
Ghee - 1 tbsp
Cashewnuts - 5
Dry grapes - 10
Cardamom powder - 1/2 tsp


Method:

  • Boil milk on medium heat until it reduces to 3/4 of its original quantity. 
  • Wash, peel and core an apple and grate it.
  • Heat a tsp of ghee and saute the grated apple for a few minutes or until it is cooked. Leave it to cool.
  • Add these apple pieces to the boiling milk. Cook on low heat for few seconds.
  • Switch off stove. Add the date palm jaggery and cardamom powder. Mix well. Taste and adjust the sweetener.
  • Heat the remaining ghee. Fry cashewnuts and dry grapes. Garnish the kheer with this fried cashews and raisins. 


Notes:

  • Do not add jaggery and boil milk. The milk might curdle.


BMLogo

Check out the Blogging Marathon page for the other Blogging Marathoners doing this BM#81

Wednesday 11 October 2017

Apple Mango Smoothie

This is not the mango season but I had some frozen mango pieces with me and since they were frozen; I didn't feel like eating them just like that. So thought of making a milkshake or a smoothie. That's when the thought stuck me that I had signed in for apple based desserts. I put on my innovative hat and made a smoothie with both apple and mango. I used milk to get the creamy texture; but probably this can be replaced with yogurt also. Serve this as a healthy breakfast drink.

My last post had beautiful pics but for this post I didn't get time to click pics in my usual setup and have to adjust with clicks from my mobile.


Ingredients:

Apple - 1
Ripe Mango Chunks - 1 cip
Milk - 1 cup
Sugar - 2 tbsp
Honey - 1 tbsp
Ice cubes - 2


Method:

  • Cut the apple, remove the core and dice into pieces. If you like, you can peel the apple before cutting.
  • Add apple, mango, milk, ice cubes and sugar in a blender jar. Blend until smooth puree.
  • Pour prepared smoothie of mango and apple into serving glasses and serve.


BMLogo

Check out the Blogging Marathon page for the other Blogging Marathoners doing this BM#81

Tuesday 10 October 2017

Apple Badam Dates Milkshake

This month I am starting the normal blogging marathon routine this week. As usual I have picked up 2 weeks of blogging marathon and this week the theme is Apple desserts.


I got this recipe from last month's mega marathon in ann's space. I was fascinated with a milkshake with dates and the ingredients were really rich in nutrition like badam, apple. The recipe was damn easy. I made a very small change to the recipe. I added a tablespoon of honey to the milkshake.


We all loved it at home so much that I made a second and a third batch. We refrigerated the milk shake and each time the refrigerator was opened we use to take a gulp. This is a sure shot at our home whenever apple arrives.


I loved the clicks that I Took this time for the apple milkshake. So I am posting many pics. Ofcourse; I know this can't be compared to Nalini - my fellow marathoner; but still I feel these are one among the best clicks from my food blog.


Ingredients:

Apple - 1
Milk - 1 cup
Almonds - 6
Dates - 6
Honey - 1 tbsp
Pista - to garnish


Method:

  • Soak the almonds for about 34 hours and peel the skin.
  • De-seed the dates - I used seedless dates.
  • Blend milk, apple, dates, badam to a smooth consistency.
  • Crush the pista pieces.
  • Finally add the honey and the crushed pista pieces.


BMLogo

Check out the Blogging Marathon page for the other Blogging Marathoners doing this BM#81

Sunday 1 October 2017

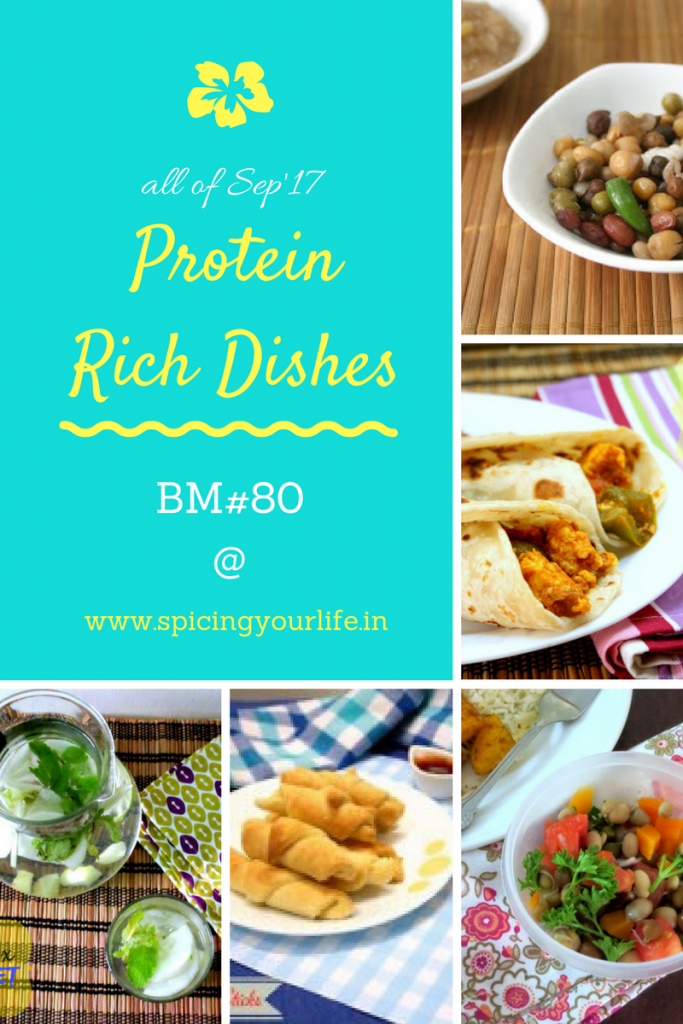
26 days of Protein rich dishes

Here's the round up of this month long marathon with protein rich dishes. As I Said in my previous post, I am really happy that I could finish this marathon on time. Actually the last couple of posts I was able to schedule ahead of time. Though I had internet problems and had to deal with my chickungunya viral infection; yet i managed. Yes there is a flaw - I am way behind in commenting but I will definitely finish the commenting part by next month.


This month marathon was quite informative. I learnt about many new ingredients that I havent yet used in my cooking like kavuni arisi, moth bean etc.. I also learnt a whole lot of paneer dishes enough to run another marathon. Though I am non-vegetarian, i was not aware that all the 9 amino-acids are present in meat and not all 9 amino acids are available in one plant-food. Lot more knowledge-gaining has happened and hopefully I will able to use them in my day-to-day cooking to make the meals more healthy.

This marathon I had planned with sub-themes for protein rich dishes where-in I tried to make a balance between vegetarian and non-vegetarian dishes.

Week 1: Beef Recipes
Week 2: Pulses excluding lentils
Week 3: Eggs and Paneer
Week 4: Chicken
Week 5: Lentils

 Over to the recipes now!!

Week 1: Beef Recipes

Day 1: Beef Kheema Dosa


Day 2: Beef Masala Curry


Week 2: Pulses excluding lentils

Day 3: Aloo Mutter


Day 4: Kaayum Payarum


Day 5: Chickpeas Pulao


Day 6: Gobi Mutter


Day 7: Sprouts salad


Day 8: Green Peas Soup


Week 3: Eggs and Paneer

Day 9: Bulls Eye


Day 10: Paneer Kofta Curry


Day 11: Scrambled Eggs


Day 12: Mughalai Paneer


Day 13: Nadan Mutta Curry


Day 14: Chilly Paneer


Week 4: Chicken

Day 15: Kori Gassi


Day 16: Fried Chicken Kebab


Day 17: Chicken Masala


Day 18: Hariyali Kebab


Day 19: Grilled Chicken Kebab


Day 20: Tawa Pulao with Chicken


Week 5: Lentils

Day 21: Mixed Lentils Paddu


Day 22: Paruppu rasam with garlic


Day 23: Kothavarakkai Paruppu Usli


Day 24: Vengayathal Vazhaithandu Koottu


Day 25: Malabar style koottu kari


Day 26: Tanjavur style poricha koottu


BMLogo

Check out the Blogging Marathon page for the other Blogging

Marathoners doing BM#80